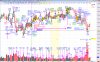
Making JH' SCT and all his material alive

Your recent edits on your last posts provide clarity. thanks a lot.


That's how I'd say the beginning. It's harder than I thought, so it's good to do it.

I have a doubt about the bar 7's global labelisation.

View attachment 204527


I need a break, my brain is melting.. all this is fantastic, beautiful, complex, and I feel I'm gonna be able to achieve it, but right now...uufff.. a lot of things merging in mind, disorganizing to re-organizing themselves... a bit overwhelmed.
I've been working since 11am, it's exactly 5am.
Break time.

AND


can't wait to be back at this. Later in the day most likely.


Hold off on labeling EE’s until you complete the price volume relationship of volume elements and the geometric translation points of price connecting the long diagonal of the parallelogram containers.

The goal is to build from volume elements the structure of the market pattern.

As for bar7 what does the end of a trend and the beginning of the next have in common?


WchPl said:
- what must volume do from pt3 to ftt in any trend ? -> increase


This is true with caveat. On the observation level of the trading fractal, it is true only on complete trends and false on incomplete one’s. On incomplete trends this occurs within the faster fractal, thus why the paradox exists and the stumbling block of annotated gaussians without a deeper logical basis and reasoning why.
 
Last edited:
Hold off on labeling EE’s until you complete the price volume relationship of volume elements and the geometric translation points of price connecting the long diagonal of the parallelogram containers.

The goal is to build from volume elements the structure of the market pattern.

As for bar7 what does the end of a trend and the beginning of the next have in common?


Here is an attempt

attempt to reach the goal.png


This is true with caveat. On the observation level of the trading fractal, it is true only on complete trends and false on incomplete one’s. On incomplete trends this occurs within the faster fractal, thus why the paradox exists and the stumbling block of annotated gaussians without a deeper logical basis and reasoning why.

You're a beast. This is crystal clarity for me. It's the structure of the whole, exposed in its pure essentiality. Thank you
 
Aa-EE as described in literature.
Other A-Band EE's on chart as described in literature too.


Yes. The three examples in the previous posted and referenced charts are the only instances of Aa. This is true.

You’ll want to review post 68 in MSoO, then 121 - 130, then go back to 69. Map out all the A band EE’s and what do they all have in common?

Then look at Ba, Bc on the charts, here’s an example:
4-29-2014 1-49-25


What is the OOE of the Primary Band?
What is the OOE of the Secondary Band?

What makes B band distinct from A band?

What is the OOE of OOE’s.?


Other than that this quote comes to mind:
“The Truth cannot be told, it can only be experienced.”
~anonymous
 
As for bar7 what does the end of a trend and the beginning of the next have in common?

Many things... But I think what is expected here is to say : An EE so a P1 ass.

Thus why my last chart has P3(end of prior trend) = P1(beginning of subsequent one)
 
Many things... But I think what is expected here is to say : An EE so a P1 ass.

Thus why my last chart has P3(end of prior trend) = P1(beginning of subsequent one)


Place BM's at the appropriate places. Draw a circle on the price pane of the moments the BO,T1's come into being.

Remove your slower fractal pt1,2,3 and place the turn types.

In your drawing you have a Set D trend. If you draw a separate drawing you can draw a Set C to Set C by not having your current drawing's Set C progress into Set D. For now keep all your volume P3's as the same height as the first P1 of your drawing. The goal is to create a drawing like the "hitch" in the price cases and work out the variations from there as the hitch gets altered to form all the other price cases. Right now you have all the volume elements progressing in size which can lead to some false assumptions later on down the road. It is accurate to a certain extent and the goal is to create a 'neutral' drawing.

Now you can 'see' by folding the drawing like origami how the different bands come into being from PP!'s, to A-band to B-K bands. You can now understand why PP!'s are named the way that they are, what the Primary and Secondary Bands stand for, and where the M1,M2,M3 are placed.

This is much like a map and is the result of your own work. It won't do much for anyone whom haven't built their mind through deduction from all the DD that you have done.

Now, just start logging and adding Turns and Trend Types in your charts. The MADA repetition is the practice.
 
In your drawing you have a Set D trend. If you draw a separate drawing you can draw a Set C to Set C by not having your current drawing's Set C progress into Set D. For now keep all your volume P3's as the same height as the first P1 of your drawing. The goal is to create a drawing like the "hitch" in the price cases and work out the variations from there as the hitch gets altered to form all the other price cases. Right now you have all the volume elements progressing in size which can lead to some false assumptions later on down the road. It is accurate to a certain extent and the goal is to create a 'neutral' drawing.


deeper again towards neutral drawing with set C to set C.png
 
Now you can 'see' by folding the drawing like origami how the different bands come into being from PP!'s, to A-band to B-K bands. You can now understand why PP!'s are named the way that they are, what the Primary and Secondary Bands stand for, and where the M1,M2,M3 are placed.

This is much like a map and is the result of your own work. It won't do much for anyone whom haven't built their mind through deduction from all the DD that you have done.

Yes...
 
Back
Top