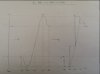
Ok. I had missed this 3x5 cards doc along the reading. Better said, I had missed to donwload to file. So I had not copied it.
It’s done now, I’ve handcopied it.
Let’s have then a new study of nodes, under the light of this doc. Black tex twill be from 3x5 cards, in blue you’ll find my own comments.
3x5 cards
A Wait
Node for sitting after Exit from J or K
Choose B or C when available.
USE PVR AND PRIOR BAR
Up to now, my own comprehension of node A is that it’s the node at which we arrive at each and any time we’ve exited. We exit and feedback from anywhere we do so, and the nit takes us to A where we are to choose between B and C. That was my comprehension.
Addind the above info, I see the possible paths from which to arrive to A are J and K. Both J and K deal with non-Dom surge, with a subtle difference.
We have to choose between B and C, this is ok. We use PRV and prior bar. What this means for me is that when you’ve exited at J or K and you arrive at A, it is because you have used PRV compared to prior bar. This would mean we use PRV for determining J or K status of any bar. Let’s see if this is confirmed.
B Wait Non Dom
Node to sit and wait for F
D condition is Trough on n OR BEFORE
Go to ENTER on open of n +1
USE PRV AND n or trough before n
My current LOU is that B is a wait node, and it’s one of the choices we can make being at A. Being as we’ve exited and arrived at A AND it’s by using PRV and prior bar that we choose (J or K) to A, we choose B cause we’re either before or after midday. I see here it is talked about D node. Its condition is a trough on n or before. So to be at D status, we see a trough on prior bar or before. Where it was, no matter where it was, prior trough, period.
Once EOB is there, B node can be the final choice. If it is so, then we go to open of n+1 bar. Here again, we use PRV AND n bar is it’s a trough (D) or earlier in volume pane if prior bar is not a trough.
C Wait This is “illiquid pace node”
Sit in VDU or DU and wait for G
AND Trough on prior bar
AND use prior PEAK as reference
ENTER on next open IF
SURGE > prior peak (any color)
My current comprehension is that C node is the other choice (with B) that we can do from A. It is for when volume is at DU/VDU level. At this status you wait until EOB and go to n+1 ENTER. At C you must wait for G condition to be here, which are volume surge > prior peak, any color.
Here, it is confirmed. You use trough on prior bar and use prior peak as reference. If G conditions are met, enter on n+1.
D Reference Look back NODE
Sit is Wait – Establish reference trough as bar n
OR BEFORE
Look for beginning of dominant move on n+1 open
ENTER on open
D node is not the most clear for me atm. It is for me, like a backwards node (like retro on Lats in RDBMS for instance). It is the node we are at when at n+1 bar open, we look back to find trough. It could be on prior bar or before.
It is said here that it is a lookback node. So it could be that this node defines the look back action. Congruent with the « retro’ comparison. Fine.
You sit and wait, estblish the reference trough as bar n OR BEFORE. So it is not necessary at D node to observe a trough on prior bar, the only necessary thing is to find the prior trough and have it as the reference to which compare what will be next. You look for dom move on n+1 open, which must mean you use PRV at 12sec and if PRV states volume will reach LI. And if so, yo entr at open. If it is not the case….I don’t know atm. It will be DDd.
E DOJI Exit choice NODE
Bar is n+1 ENTER bar.
For post DOJI IBGS box N test:
__Select F or G status at color change of DOJI___
IF volume declines below LOCK IN, EXIT
Then, VIA H, choose J or K and feedback to A
I have considered that E node is like Q node but at Enter column. It’s where we proceed to either find F or G. That’s all.
Here it is said it deals with doji and is an exit choice node. Wow. Full contradiction with was I hade understood. Good.
For post doji IBGS box N test…this means it’s the case where in n+1 bar, we meet M node. Doji is there. So we must do N test.
Then select F or G status at color change of doji : so this means N test passes. So it must mean if the doji happens AND the test passes, then you must choose either F or G condition.
I know F and G are Dom volume surge. So this would mean apart from having a doji pass, we have PRV saying we’ll meet lock in, and in the end if it’s the case we’d be at L and go to proceed to Q.
Then the text says : if volume declines below lock in, you exit. Here I have a doubt. Does this mean if PRV falls below lock in OR volume at EOB is below lock in ? I don’t know atm. If first option is true, the nit would lead to multi « back to A » moves along the same bar.
Finally the text says : VIA H, then choose J or K and feedback to A. H is when either for F or G, dom volume fails. So if after selecting F or G status at color change of doji, volume grops below lock in, then via H you exit cause Dom has failed to happen for either F or G.
F Dom volume W/color change NODE
Bar is n+1 ENTER bar.
IF volume declines below LOCK IN, EXIT
Then, VIA H, choose J or K and feedback to A
IF volume maintains and lock in occurs, go to L,
then Q at end of bar
From what I’ve understood so far, F is for an an +1 bar, after a B status on prior bar. When n+1 bar opens, we look its PRV at 12sec. Either it says we’ll meet lock in and volume changes, or it could say dom will fail to surge then we’d exit to A via H. In the first case,we’d be at F. From the first nodes texts read in the 3x5 cards I’m beginning to imagine something new : maybe we’re always to use PRV in any column. And along a single bar formation, PRV can say several things. From what I remember, we use PRV at 12sec, then at 60, 120, 180, 240 and 300 finally. It’s not very useful nor sensful to say we measure PRV at 300 being as it is necessarily equal to real volume level at EOB. So it would be a 5 times PRV measurement. And the consecutive 5 results could lead to different IDs. Hmm.. Interesting although I’m unsure this is partly, mostly, totally wrong/correct. In any case, it’s a new idea that surges to my mind as I’m working on this FCC1. Good.
What reinforces the confidence I have in what I just said, is the « maintains » word in the text.
The text says F is a Dom volume move w/ change of color. It is n+1 bar. Then, if volume falls below LI you exit. Which volume ? PRV I’d say. And as you exit, you choose J or K towards A.
Then it is said : if volume
maintains and lock in occurs, go to L. This is the « maintains » in question that makes me think it’s to PRV we’re referring to here. Along the 5 measurement, « volume » but in fact, PRV could consecutively indicate an anticipated final non dom volume, and at the very first result of PRV, we’d be sent to A via J/K. Or it could consecutively indicate an anticipated lock in level of volume, and this would consecutively take us from F to L. Or, final option, PRV along its 5 measurement could alternate between Dom/nonDom final volume, and this would lead to what was called « multi DA » in a single bar. That would be intrabar multi orders. This would be extracting the full offer (FO) of the market’s first step.
And then Q at EOB.
Again, I’m unsure atm, but it sounds new and provides clarity, at least.
G Enter bar after end of “illiquid pace node”
Sit in VDU or DU and wait for G
Use reference Trough on prior bar OR BEFORE
Use prior PEAK as reference
ENTER on open when volume SURGES > prior peak (any color)
IF volume declines below LOCK IN, EXIT
Then, VIA H, choose J or K and feedback to A
IF volume maintains and lock in occurs, go to L,
then Q at end of bar
G for me is when volume exceeds prior volume peak when..ok, I notice I was gonna say something wrong. I understand G is when coming out of midday.
To determine a peak, we need an decreasing volume bar just after the peak bar in question. A peak is a peak only if compared to a trough. Troughs exist cause peaks are there. Day can’t be without night. Any thing is only the relation to what it is not. Etc.
So the text says use reference trough on prior bar or before. Use prior peak as reference. So we’re after end of VDU/DU period, volume (PRV I suspect) exceeds prior peak which is our reference, and which is determined to prior trough that can be either on prior bar or before. If G conditions ar emet, then we enter. From what I currently suspect, as long as PRV says we’ll exceed prior peak, we’re at G. ASA PRV along one of its 5 measurements, announces a falling volume compared to prior peak, then dom fails and we’re at H and take J/K to feedback to A. Or…volume could maintain above prior peak and END above it and this would take us to L.
From what I DD, it must PRV that is used along the bar and now current volume, because if not, this would make H node impossible. Therefore, what I can DD from that, is that we could have back and forth moves in terms of nodes along the bar. For example,F conditions are met at 12sec of n+1 bar, same until 4min measurement where this time PRV says non-Dom will be the final status of volume, which would take us to A via H, we’d choose B….but what if between 4th and 5th minute, lock in appears finally ? Would this take us to L ? Here there’s a problem. I think I need a new bar for that. I mean, we need n+1 bar. Ow ,but that’s where we are, at n+1. Hmm… need visual illustrations, more nodes studies and critical thinking to arrive at DD.
This FCC1, although it is far away from the complexity of certains items of RDBMS, like EE’s for example, begins to look like them a bit.
H “OR” NODE
Pass through H coming from F or G
Only on way to J or K VIA “X”
For now, I have no problem with this node.
J EXIT NODE
Exit when volume fails to lock in during any bar.
(includes F, G, R or S nodes)
OR
Exit when DOJI test fails because price cannot pass through and beyond DOJI
Feedback to A ASAP and determine Wait node B or C.
The first sentence can be interpreted as a confirmation for me. Exit when volume fails to lock in during any bar. In fact, I notice all the current crux I am facing, reminds me the concept of « re-enter ». If the volume in question was at EOB, could JH have said « during » any bar ? I don’t think so. It makes me believe it’s PRV we’re talking about here…
The exit action for that non-Dom appears during any bar includes F, G, R, S nodes.
(I was just rereading some nodes and : )
I may have just cleared up something. I realize now, I’ve, since the beginning uncounsciously considered n bar as = 1st bar of the trend ; n+1 bar = 2nd bar of the trend ; n+2 bar = 3rd bar of the trend ; n+x = 1+xth bar of the trend and so on.
This is so wrong I think now.. I can see for example, in column n+1 we can be sent to H status. This is a n+2 column node. This would make one consider its current bar (n+1) as sent to a n status (A) via a n +2 node/status (H). And we’d be at A at N. AT N. So this would be a MOMENT along the SAME bar formation. From this, I can DD the « re-enter » concept AND I see much more of the flow of the FCC1.
This was maybe a huge Aha for the resoluton of this chart…. All this is making me sweat quite a bit.
So, at J either you exit because of L-fail (NotL), OR you exit when doji test fails. In any case, feedback to A.
I see many price paths inside a single bar. I see fractals. I see nesting action. I see a lot of things. Is all this tending towards divine precision ? « As an expert, you knock down from 3 to 6x ATR each day ». Oh yes it is….
K EXIT NODE
Exit when ANY color non dominant volume occurs.
Feedback to A ASAP and determine Wait node B or C.
I am not yet able to distinguish J and K.
L Lock In NODE
Sit at L when F or G volume exceeds the prior bar volume.
Hold through end of bar and proceed to Q.
This may be, seeing what the text hee says, the node I had best undrstod so far with M and N.
It is here clear for me (but I am ready to unvalidate in a near future what i’m gonna say) that in n+1, once current volume along the bar exceeds LI, we go from F/G to L. So F and G must have been temporary status of the bar until volume effectively exceeded LI. Temporary status based on volume. This must deal with PRV. It must !!
If so, so if LI occurs, you hold until EOB and arrive at open of next bar at Q.
M DOJI NODE
When DOJI occurs BEFORE or AFTER lock in,
PROCEED to N DOLI test box.
We have a lot of clarity here. Doji can happn after or before lock in. In any case we perform N doji test.
P “OR” Feedback GATE
Pass through P coming from DOJI Failure or
AFTER DOJI PASS with color change
Proceed to node E and consider bar to be an n+1 bar.
At E, choose F or G upon arrival at E.
If I remember correctly, I have neglected the study of P node ; It’s time to remedy that.
What I understand of this node, at the light of the text, is that after an N doji test, the result is binary : pass or fail. In any case, I understannd you feedbcl to E and …consier the bar to be a n+1 bar.
I had neglected a node that is a big confirmation of what I am sensing today on this chart.
Q “OR” NODE
Pass through Q coming from F or G or lock in L node.
Only on way to R or S.
Choose R or S at beginning of bar n+2.
The first sentence creates dissonance to me. From what I’ve understood, at F or G, PRV can along its 5 measurements :
- Fall below prior bar : To A through H
- Always be above prior bar : Hold for F/G and go to L at LI then to Q
- Alternate between above/below LI and make a B>>F>>H>>A>>B>>F etc loop, for example
And at any time during bar or at EOB, 2 possibilities :
- LI occurs, so we’re at L and go to Q
- LI does not occur, and go to A via H by choosing J/K
In any case, I see I can go to Q only from L, which is a node I see as kind of « post F/Gness ».
Therefore, I’munsure why I understand the first sentence of the text as « you can arrive at Q from F/G, or from L. ». Fromm y LOU, I’d say it’s only from L. Cause if F/G is there at EOB, it means we’re at L. If not, we’re at Not L so we go to A via H etc. Maybe I’m simply not reading between the lines or psyching myself out a bit.
To be continued...