08/15/19 's MADA's Debrief
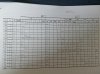
Bar 12 : IF BMrev had not been there, I'd have logged PP3 on the upper level AND P1ass on lower level.
Bar 19 : The sequence is P1-INT-T1-P2. This fits with my current understanding of PP1b. If so, then here is the cascading effect :
Look on your sheet. The above is PP1c. PP1b has the element of repeats with acceleration.
View attachment 208708
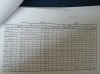
Bar 48 : Same DD as bar 19. Resulting cascading effect is :
View attachment 208715
Bar 60 : Ab needs a P2 established. It is not, here. So repeat T1 and NOT Ab.
Look at your volume element ranges; where is T1 killed?
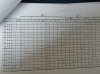
Resulting cascading effect :
NB : on bar 65 I had initially IDd a PP1. It was tricky AND I'm not sure about if I had followed the logic. I had an interruption of the existing tl initiated by H of bar 61 and touching after fanning, H of bar 63, because of the BMrep at high of Lat4. Lat 4 being above pt1 of prior established tl AND being as no rtl must be begun into a Lat AND from retro Lat 4 onwards we can measure all subsequent bars and then we have significant statistic measurement we can draw rtl (my DD).
Then, I compared the slope of new rtl between Lat4 and Lat5, with the rtl's slope initiated by Lat1. There was acceleration AND additional requirement for PP1 was satisfied SO I had ID'd PP1. Just wanted to clear it a bit and expose this item being as it had been the first time I had to face it.
With current debrief, the "tricky case" disappears. Let's see how I see it when it happens again.
Bar63 has an EE that always is in the background and takes precedence. The progression of trend is always on one side of the rtl and BM pairing. If the price bars are closing by XO the rtl then the trend is no longer in the same trend segment.
Bar4 of a lateral is either a retro or it's not. If it is, then perform the retro procedure, if not then continue counting the bars of the lat without the retro measurements.
View attachment 208720
End of the debrief and part 5 with re-ID of turns, trends and blobs.
View attachment 208723
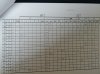
There is only one zone requiring somme deeper DD and this deals with my EE's Matrix that I'll not touch until I'm finished with the 20 sessions :
On bar 69 : BO,T1, P1ass
bar 70 : INC vol so P1 repeat
bar 71 : OB w/DEC below leftmost P1 so T1/P2
bar 72 : INC vol below leftmost P1 so P2 repeat
bar 73 : INC vol above prior P1 so P1revchron
bar 74 : INT w/DEC so wait
Generally, if the trend has progressed past the 2nd peak then the next event after the 2nd trough is the third peak otherwise known as P3P (ftt). Looking at the chart, an obvious turn did occur which confirms that this trend segment has ended. If there was no turn and the trend segment continued short then P3F would have been considered on decreasing volume. Increasing volume with a P3P would have been an EE. Decreasing volume at this point in the progression of trend is a failure to present the 3rd peak in a complete trend segment. Unless a FS overrides,...
FS overrides happen quite frequently when one starts to accelerate rtl's as one's differentiation increases to see the possibility of 'carving turns.'
One is always looking for the advance of the 'tell' as the market telegraphs one of the three types of turns composing the 4 types of trends prior to actually making the turn on the next bar or series of bars.
bar 75 : second P1 after P2 w/P2 below P1ass so Ad.
For an Ad, the wait is in-between the leftmost P1, T1, P2 or 2nd P1. Not between the two rightmost P1's adjacent the HRE.
Here is what I wonder : what if volume had been DEC and above second P1 (so not the assigned) ? I'd say at first sight P1 repeat although it's below prior P1. But as I debriefed, I dwelled on this case a bit. No big deal, this will be solved later AND I will not dwell on this more being as it would not stick to the "doing MADA without constant corrections".
Next session coming soon.